Bathroom Installation Cambridge
Sam Kear enjoys working on weekend DIY home improvement projects.
If you're moving into a new home or remolding a bathroom, you may need to install a toilet paper holder. Even if you don't plan to move anytime soon, over time bath tissue holders wear out and eventually need to be replaced as well.
In this article, I'm going to walk you through the process of installing a toilet paper holder in your bathroom step by step.
9 Simple Steps to Install a Toilet Paper Holder
- Determine Location
- Gather Tools
- Prep the Supplies
- Place Template on Wall
- Level the Template
- Find Studs in Wall
- Drill Pilot Holes
- Install Mounting Brackets
- Finish Up
1. Where to Hang the Toilet Paper Holder
Choosing the location for the holder to be mounted can be the most difficult part of this job. Each bathroom is unique, so you may need to make slight adjustments for your particular situation. You might want to experiment with several locations before you start to drill the mounting holes.
Standard Location
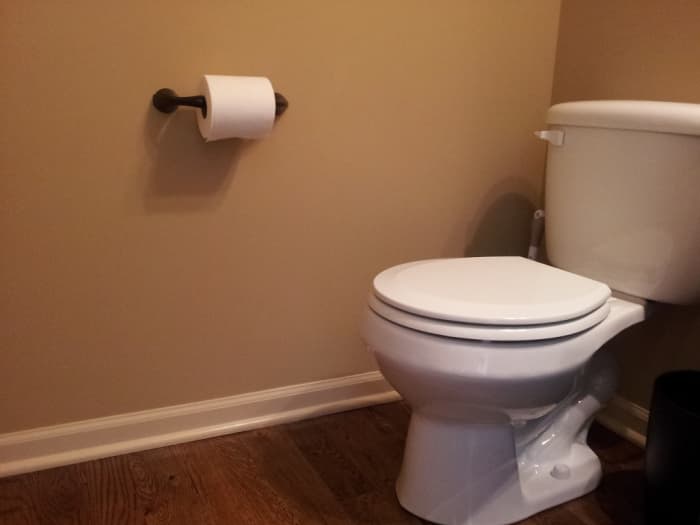
The rules aren't set in stone, but the generally accepted standard is to mount the holder on the wall 26 inches above the floor, and 8 to 12 inches in front of the toilet.
Other Possibilities
If there isn't a suitable location to the left or right of the toilet you can consider a couple of other options.
- In front of the toilet: Another option is to mount the holder on a wall in front of the toilet 26 inches high. This option is only feasible if the holder would still be within reaching distance.
- Freestanding holder: If you can't decide on a mounting location you could purchase a non-mounting holder instead. Freestanding holders can be easily moved to another location without having to drill holes.
In order to mount the bath tissue holder, you will need the tools listed below. A stud finder is optional, but it does make the job a lot easier.
- Power drill with drill bits
- Bubble level
- Screwdriver
- Masking tape
- Stud finder (optional)
- Hammer (if using drywall anchors)
3. Prepping the Parts
Before I start on any project, I like to make sure I have all of the parts I'll need to complete it. Open up the box for the holder you'll be installing and make sure you have everything you need.
You can also dry-fit the pieces to see how they will go together before you start to drill.
Most kits include a paper mounting template to assist with drilling the holes. Locate the template in your kit and cut it out if necessary.
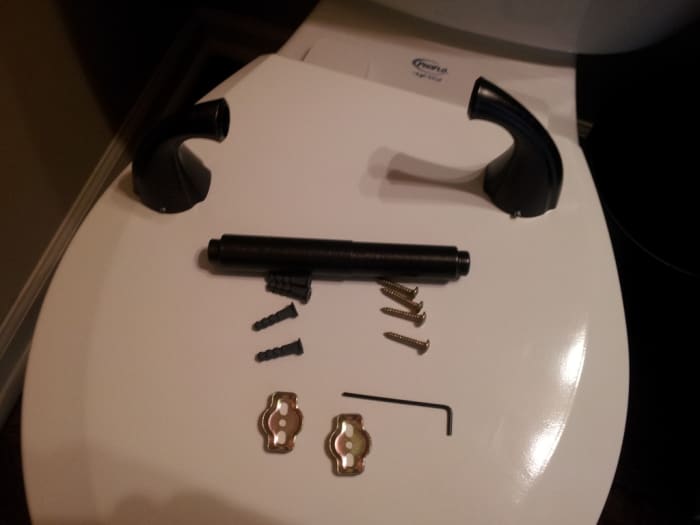
Make sure you have all the parts you need before you start.
4. Placing the Template on the Wall
The next step after selecting a location is to tape the template to the wall. You should use masking or painter's tape to attach the template so the paint won't be damaged.
The template will mark the location where the holes will be drilled for the bracket. If you want to get an idea of what the holder will look like you can hold it up against the template.
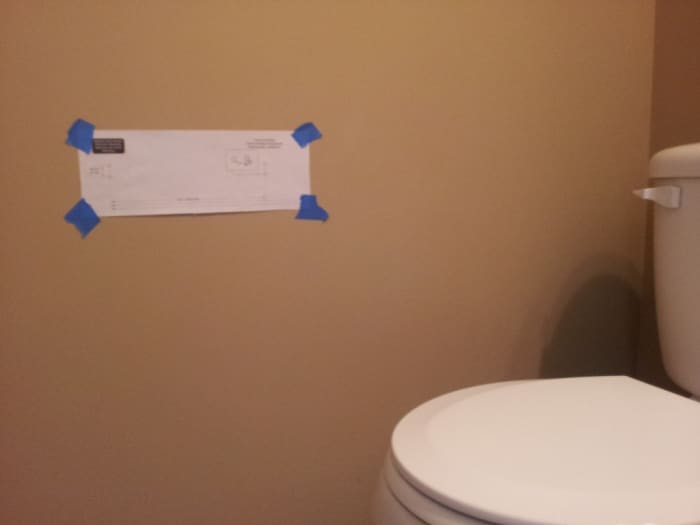
Tape the mounting template to the wall using masking tape.
5. Make Sure the Template Is Level
Place your level along the top edge of the template and make sure it is completely level. If the template isn't level then the holder will not be level once it's mounted.
Read More From Dengarden
If you need to make any adjustments loosen the tape and re-level the template. This step is very important so you might want to double-check your work.
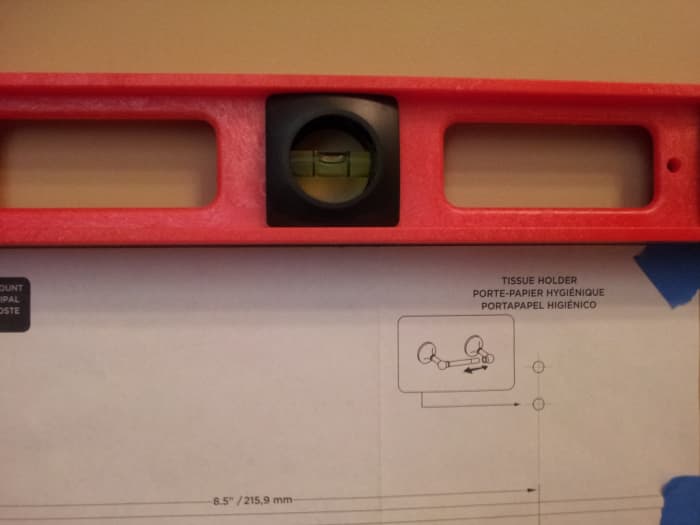
Make sure the template is level before you start to drill.
6. Locate Any Studs in the Wall
Next, use a stud finder to determine if you will be drilling into any studs. Slowly move the stud finder along the wall and mark any studs you encounter.
If you discover that any of the holes will be drilled into a stud, it's not necessarily a problem, but you will not need drywall anchors for those holes. Some people actually prefer to have at least one set of mounting holes go into a stud for added stability.
If you don't have a stud finder, you can gently tap on the wall to look for the studs.
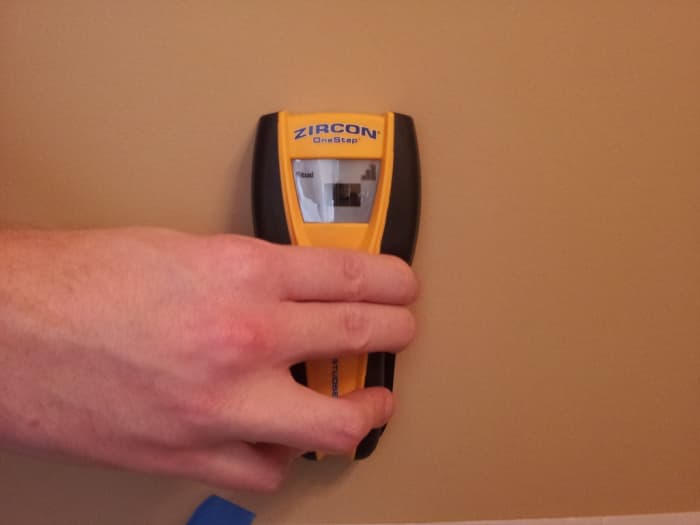
Use a stud finder to mark the location of any studs on the wall.
7. Drill the Pilot Holes
After making sure the template is located in the proper location you can begin drilling the pilot holes.
- Use the drill bit size listed in the instructions.
- Making sure the drill is level carefully drill holes in the locations marked on the template
- Remove the template after all holes have been drilled, most mounting systems require four holes.
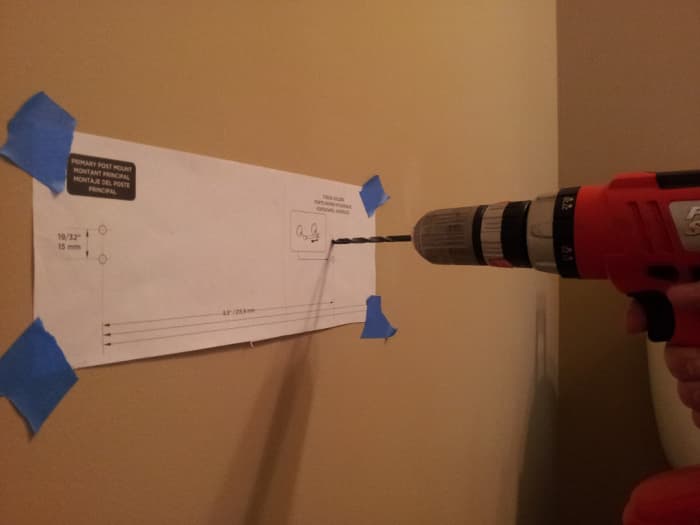
Drill the holes using the bit size specified in the instructions.
8. Installing the Mounting Brackets
- Using a hammer, tap the drywall anchors into the screw holes. If the holes go into a stud, you will not need the anchors.
- Secure the mounting brackets to the wall using the screws in the kit.
- Place the holder on the mounting brackets
- Secure the holder to the brackets by tightening the lock screws. The lock screws should be on the bottom so they cannot be seen.
- Make sure the holder sits flush against the wall.
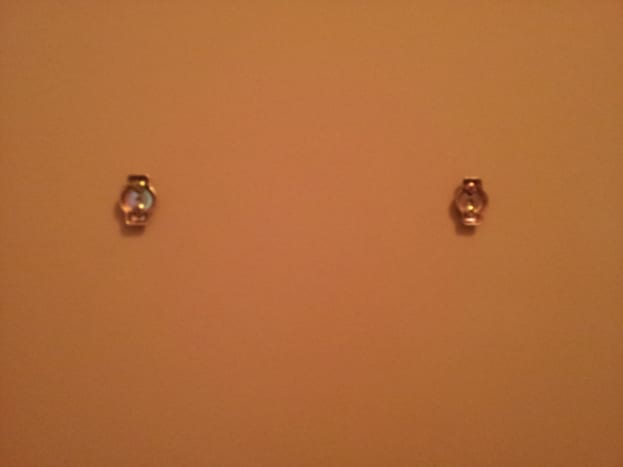
Secure the brackets to the wall using the screws.
9. Finishing Up
Drilling holes in drywall tends to create a lot of dust, so I recommend cleaning it up with a vacuum as soon as possible.
Gently pull on the holder to make sure that it is attached securely to the wall. If the holder moves when you touch it go back and make sure all of the screws are fully tightened.
Now that you've successfully completed this project, you can easily install other items such as towel bars and towel rings which typically use very similar mounting systems.
This article is accurate and true to the best of the author's knowledge. Content is for informational or entertainment purposes only and does not substitute for personal counsel or professional advice in business, financial, legal, or technical matters.
David on December 27, 2017:
Can't get the toilet paper bar set screws to attach to the brackets
Ted on September 01, 2017:
Ppo, your screws are most likely in those holes. Often times they are painted over by accident. Try scraping out the hole, you may discover a tiny flathead screw
ppo on August 22, 2016:
My toilet paper holder and towel bars have small slot under the round bases however, I cannot see a screw of any kind all I can see is a small metal flat piece near the opening...how do I take these off the wall!! Thanks
Keri Machin from Miami Florida on August 25, 2013:
nice guide. such a basic thing but i had to look it up lol
JOAT2 on January 26, 2013:
If you are installing a toilet paper holder that has only one attachment (single mount) to the drywall, you will need to either install the screw into a stud or use a toggle bolt (other anchors might work, but not as securely). The larger the toggle bolt, the more secure it will be, but only use one that is large enough to hold securely. Other types of anchors tend to twist when torque is applied to the toilet paper holder through normal use.
Bathroom Installation Cambridge
Source: https://dengarden.com/home-improvement/How-to-Install-a-Toilet-Paper-Holder-in-a-Bathroom
